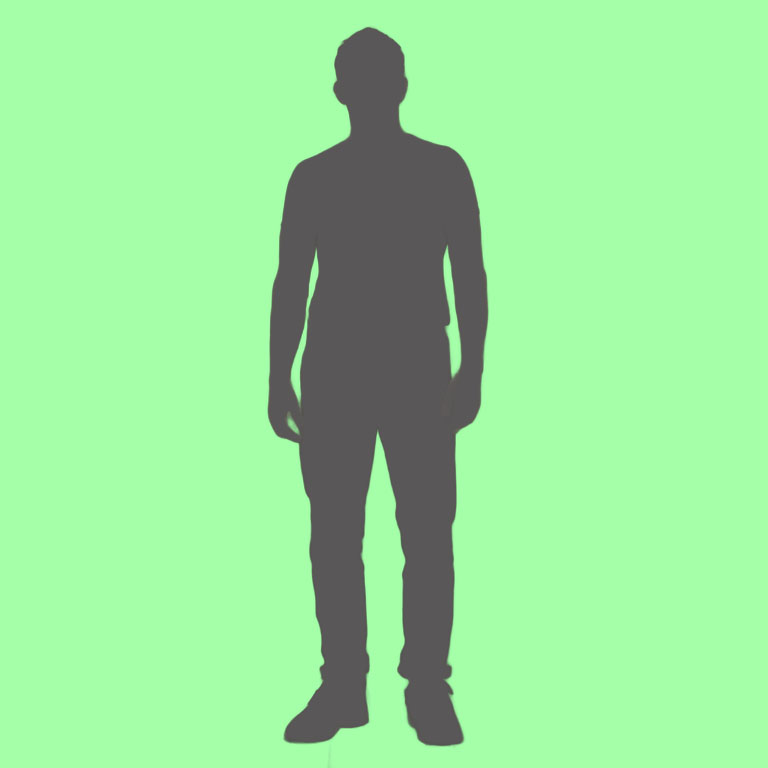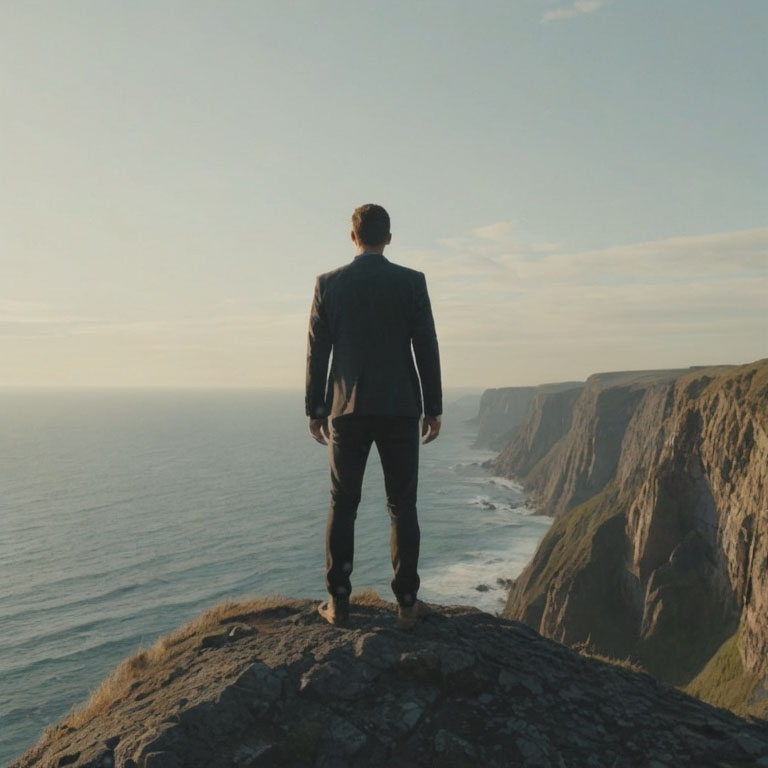


This image was created by Stable Diffusion with the following prompt:
Prompt – cinematic shot of a man standing on the cliff, not facing the camera
Negative prompts – (worst quality, low quality, normal quality:1.8)
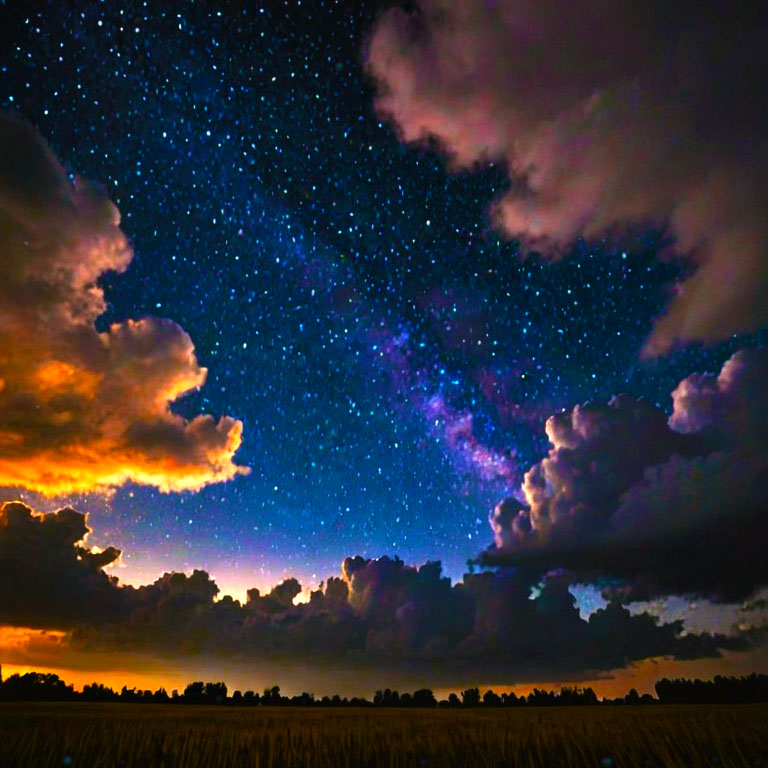
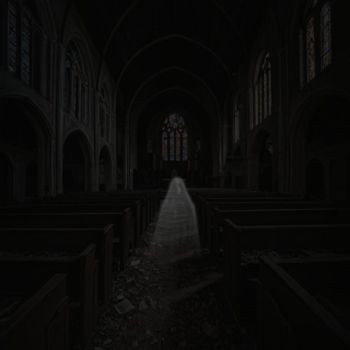
This image was created by Stable Diffusion with the following prompt:
Prompt – a lot of clouds, night clouds full of stars beautiful black clouds
Negative prompts – (worst quality, low quality, normal quality:1.8)

Select subject. If that doesn’t work well, please manually select the subject by using the Quick Selection Tool.
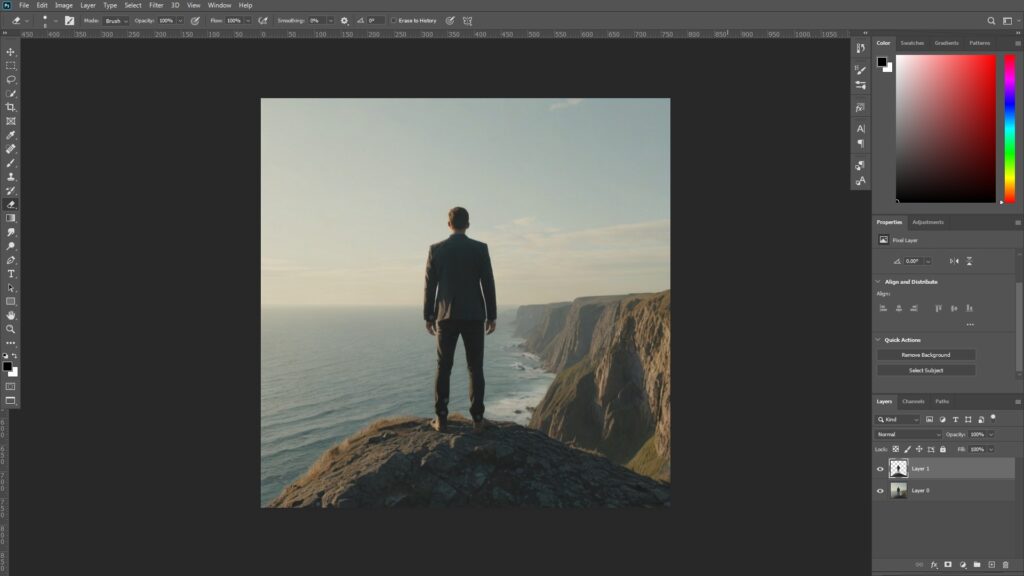
[Control + C] to copy and [Control + Shift + V] to paste in a new layer.
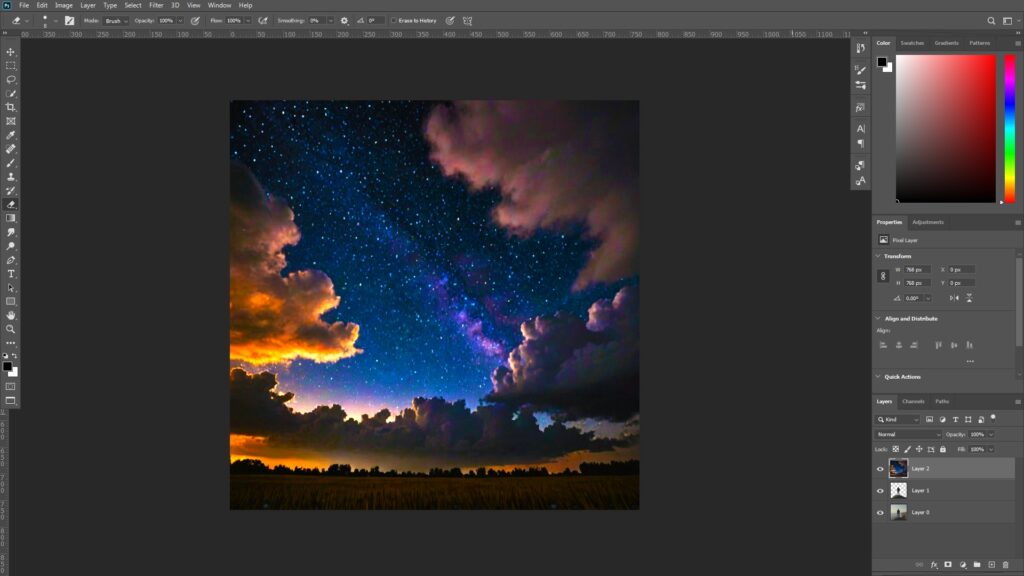
Copy and paste the background image into the subject image, and place the background layer below the character layer.
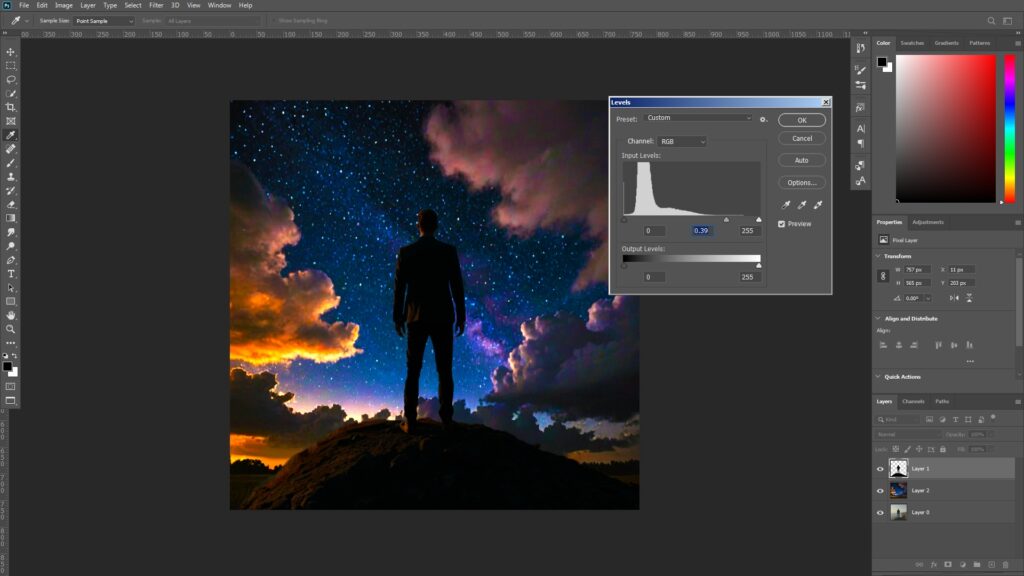
Select the character layer, and go to [Image -> Adjustments -> Levels] to make it look much darker like this.
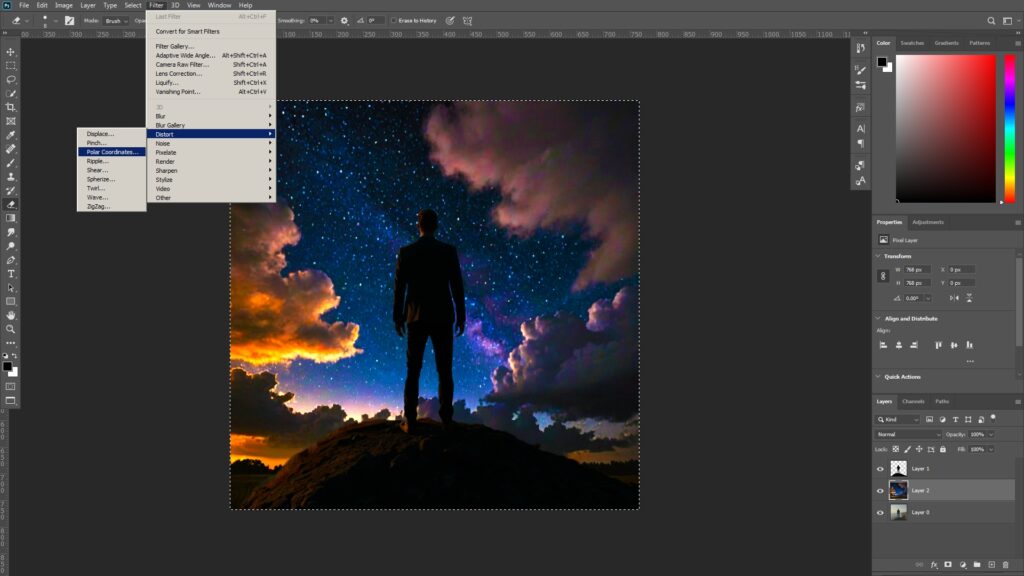
Select the background layer, [Control + J] to duplicate the layer, select the duplicated background layer, and go to [Filter -> Distort -> Polar Coordinates].
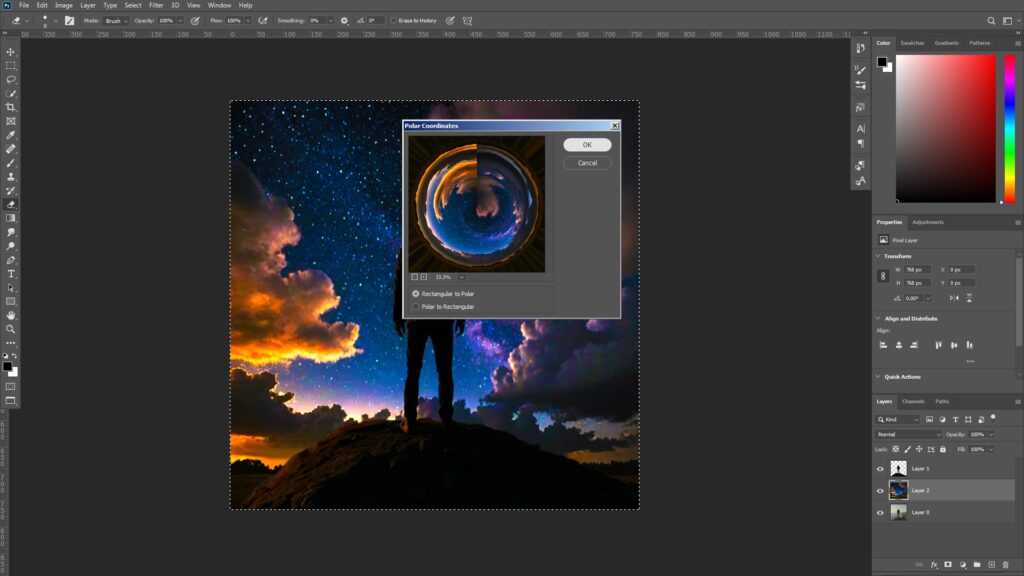
Let’s apply the filter.
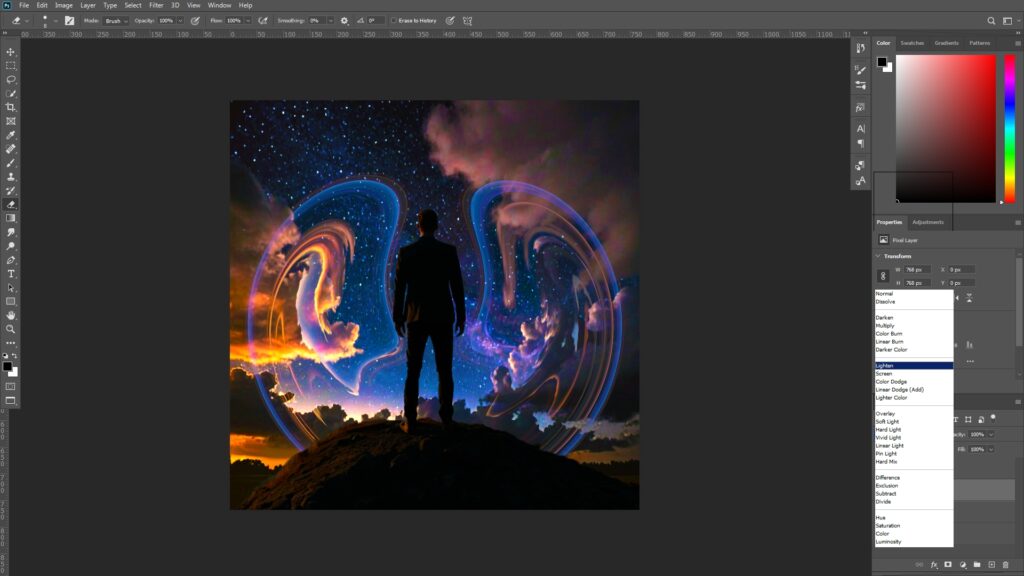
Change the blend mode of the duplicated background layer to Lighten.
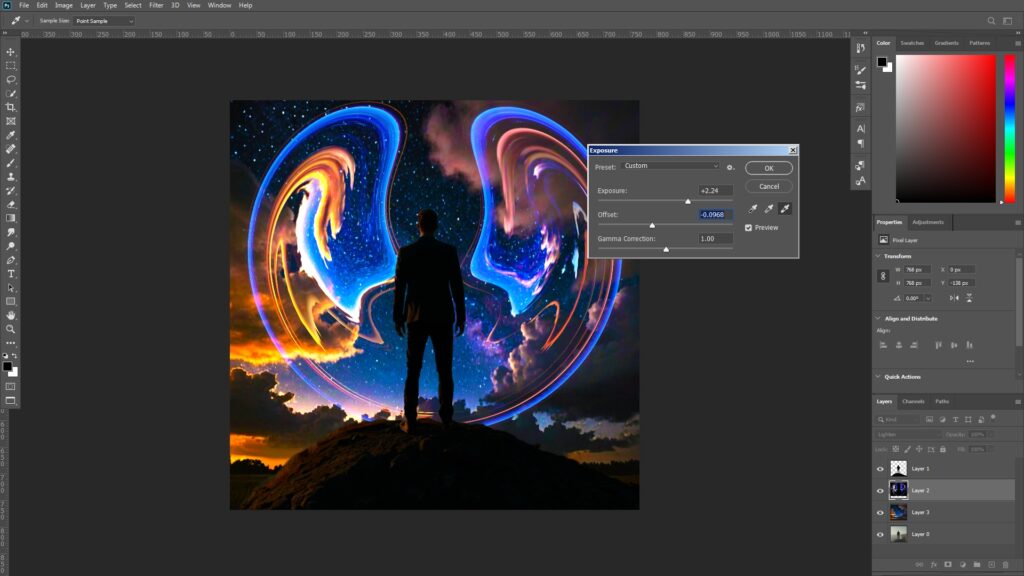
Go to [Image -> Adjustments -> Exposure].

Go to [Filter -> Blur -> Radial Blur].
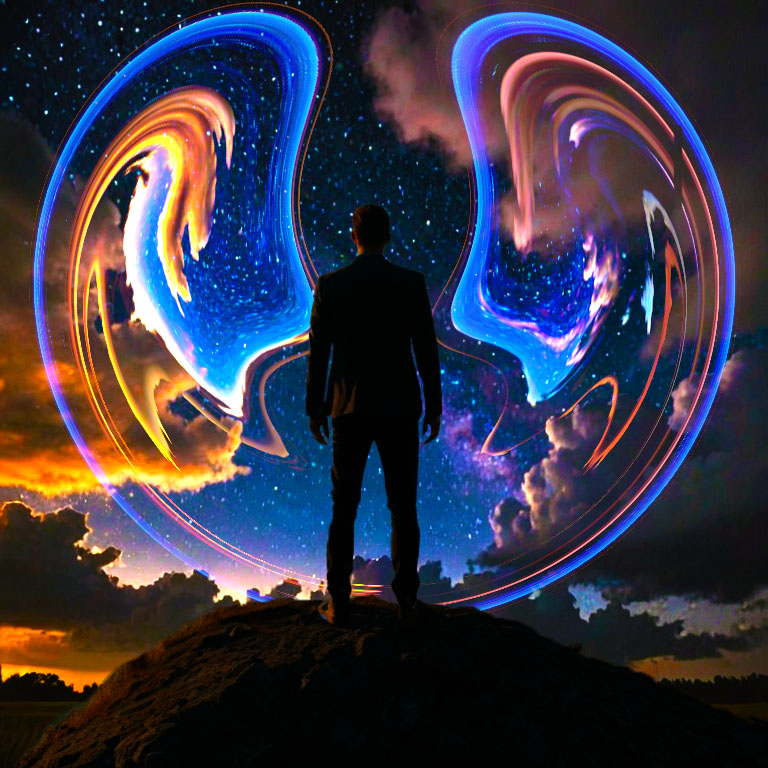
Here is the result before the Radial Blur was added to the image.
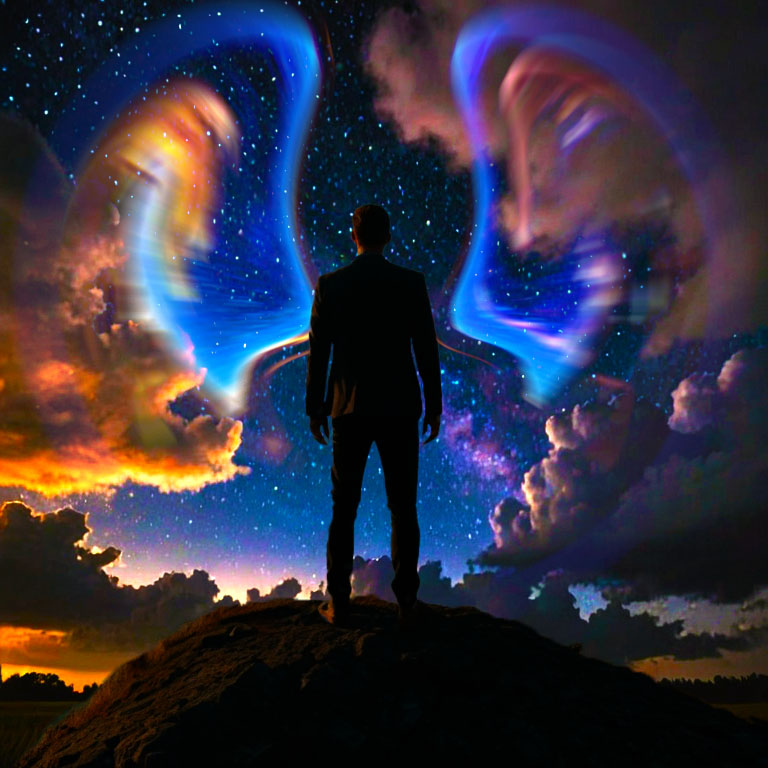
Here is the result after the Radial Blur was added to the image.
This is the end of the tutorial. 🙂