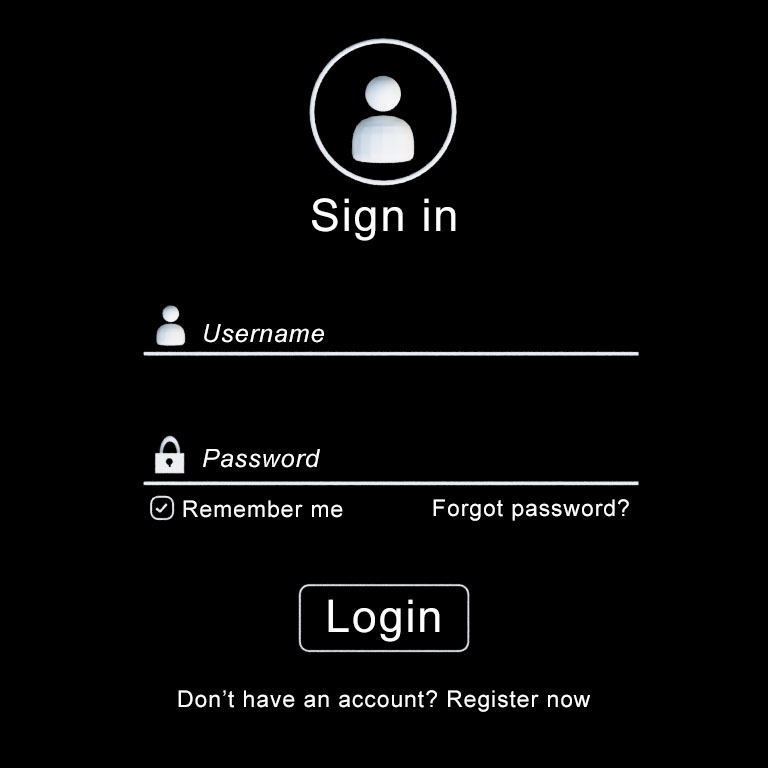


I have added the collaborating text objects by using the following settings.
- Sign in – Arial, 45 pt, regular
- Login – Arial, 45 pt, regular
- Username– Arial, 25 pt, italic
- Password – Arial, 25 pt, italic
- Remember me– Arial, 23 pt, regular
- Forgot password?– Arial, 23 pt, regular
- Don’t have an account? Register now – Arial, 23 pt, regular
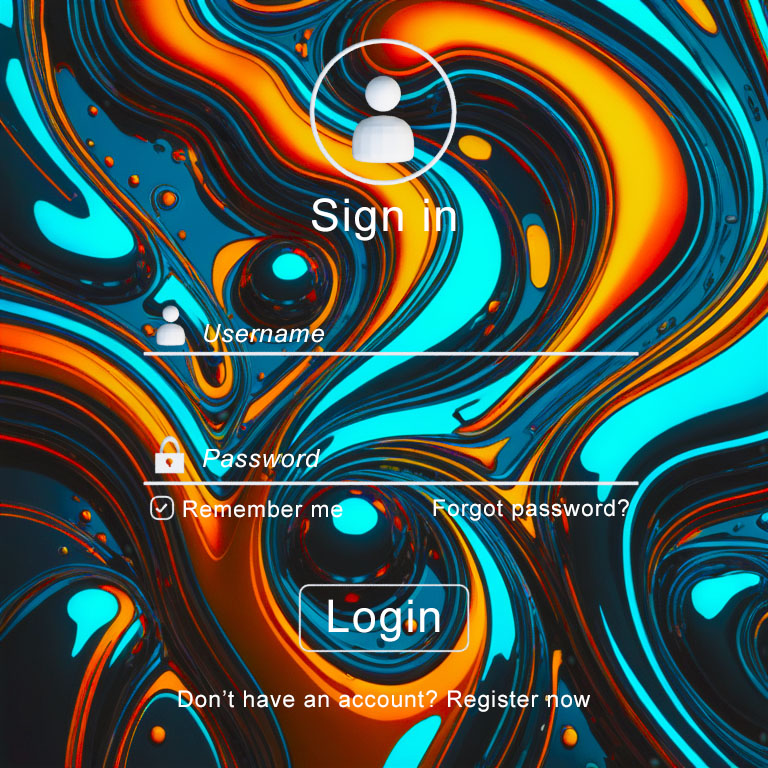
Here is a result when I copy and paste a Stable Diffusion generated image to a layer below the text GUI layer.
This image was generated by using the following prompt:
Prompt: neon and chrome futuristic abstract art, beautiful random shapes mixed and flowing together like oil and water
Negative prompt: (worst quality, low quality, normal quality:1.8).
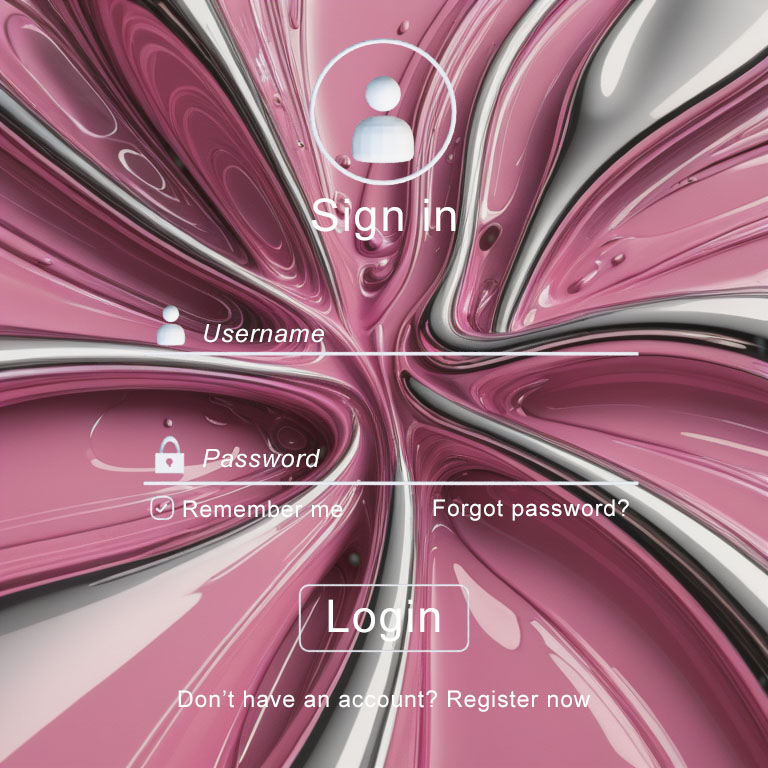
Here is another result by using a Stable Diffusion generated image to a layer below the text GUI layer.
This image was generated by using the following prompt:
Prompt: shiny pink and chrome futuristic abstract art, beautiful random shapes mixed and flowing together like oil and water
Negative prompt: (worst quality, low quality, normal quality:1.8).
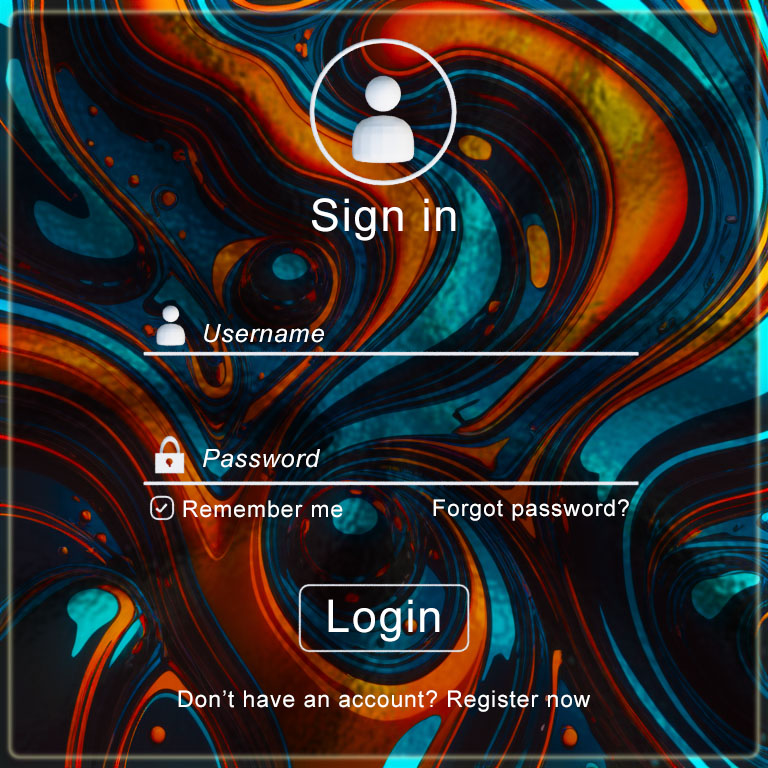
For this example, I have used a Rounded Rectangular Tool to create a transparent and dark interface like this.
1. Create a rectangle.
2. Click the Stable Diffusion image layer, press [Control + C] to copy, create a new layer, and [Control + V] to pate.
3. Add an inner shadow layer effect.
4. Change the layer blend mode to [Multiply] and adjust its opacity.
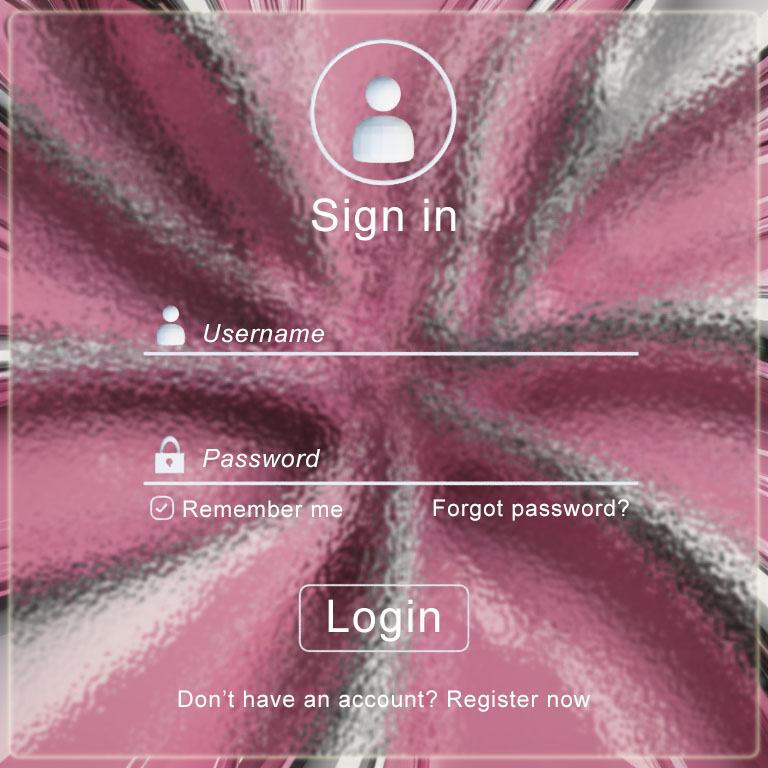
For this example, I have used a Rounded Rectangular Tool to create a transparent and dark interface like this.
1. Create a rectangle.
2. Click the Stable Diffusion image layer, press [Control + C] to copy, create a new layer, and [Control + V] to pate.
3. Add an inner shadow layer effect.
4. Go to [Filter -> Filter Gallery -> Glass] and add a slight glass effect.
5. Go to [Filter -> Blur -> Gaussian blur] to add a slight gaussian blur to create a glass effect.
This is the end of the tutorial. 🙂